Even experienced steelwork professionals aren’t immune to occasional “oops” moments on site. This post identifies five common mistakes that happen in steel construction – from misaligned anchor bolts to welding blunders – and provides practical tips to avoid them. Each mistake comes with a light-hearted nickname and a serious lesson, so you can laugh, learn, and ultimately prevent costly errors in your projects.
1. The Anchoring Misadventure – Misaligned Anchor Bolts
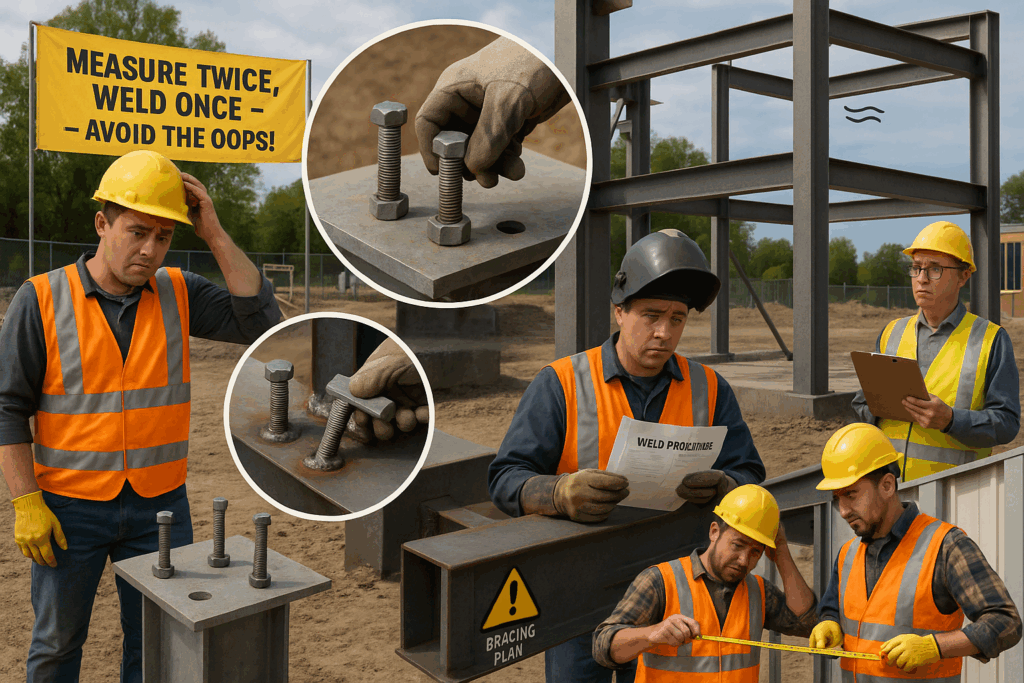
The Mistake: You arrive with a shiny baseplate and column, only to find the cast-in anchor bolts in the concrete foundation don’t line up with the holes. Uh-oh. Perhaps the bolts were set out incorrectly, or shifted when the concrete was poured. Either way, your column is not “bolting” to anything but air.
Why It’s a Problem: Anchor bolts are literally the foundation of your steel structure. Misalignment can delay the project as you scramble for fixes. Forcing a column onto mis-set bolts could introduce unintended stress or leave some bolts unloaded (not good in the long run). In worst cases, badly misplaced anchors might mean re-drilling the foundation or, gulp, re-casting a portion of it.
How to Avoid or Fix It: First, prevention. Use bolt templates and double-check before the pour. Survey the bolts afterwards while the concrete is still wet enough to adjust, if possible. Communicate in the drawings allowable tolerances (typically a few millimeters) and ensure the formwork team knows steel doesn’t tolerate large errors. If despite all this an “oops” occurs, common remedies include slotting the base plate to accommodate the bolt position or using a plate washer that spans an elongated hole. Slight bends can be made in bolts (with careful engineering judgment) if the offset is small and the bolts are ductile – basically cold-bending them into position, but this must be done cautiously to avoid cracking. For bigger misalignments, sometimes new holes are drilled in the baseplate or post-installed anchors (like heavy-duty epoxy anchors) are added after cutting off the miscast ones. None of these fixes are as good as getting it right initially, of course. So, the real hero is a diligent site engineer with a tape measure during the pour, preventing the misadventure in the first place.
(Pro tip: If you ever find yourself tempting fate by saying “the anchor bolts look close enough,” stop right there. “Close enough” doesn’t cut it – get the total station and be sure. No steel column ever said, “I’ll just stretch a bit to meet that bolt.”)
2. The Grade Gamble – Using the Wrong Bolts (or Nuts/Washers)
The Mistake: Grabbing whatever bolts are handy instead of the specified grade. Or mixing up metric vs imperial, or using an A2-70 stainless bolt where a 8.8 carbon steel was called for. The result? Incorrect fastener material or strength connecting your steel elements.
Why It’s a Problem: The engineered connection design assumes specific bolt properties – diameter, grade (strength), and type. A lower grade bolt might fail under load (shear or tension), or a stainless bolt might suffer creep where a high-tensile one wouldn’t. Mixing thread types (say, forcing a metric nut onto an imperial bolt) can strip threads or give a false tightening torque. Using the wrong nuts or washers with high-strength bolts can also reduce connection capacity (e.g., not using a hardened washer where required can lead to embedment and bolt preload loss). Essentially, the connection becomes the weak link, and if it fails, the steel beams or columns it joins might as well be decorative.
How to Avoid or Fix It: Quality control and labeling are your friends. On site, have a system to store and label bolts by type. Train crews that a bolt is not a bolt is not a bolt – they are not all the same. The project spec usually calls out the grade (e.g., 8.8, 10.9, A325, etc.); ensure procurement delivers the right ones and check mill certs if critical. Before erection, inspect bolt markings (most high-tensile bolts have grade stamped on the head). If a mistake is discovered (e.g., lower grade installed), replace those bolts – it’s tedious but worth the peace of mind. Never mix components of different bolt grades (don’t use a Grade 8 nut on a Grade 10 bolt, etc.). Also, pay attention to bolt length: using too long a bolt with too many threads in the shear plane can reduce capacity, and too short a bolt might not fully engage the nut.
Tightening is part of this equation: using a calibrated torque wrench or tensioning method ensures you achieve the required preload for slip-critical connections. A common oops is not actually tensioning high-strength friction grip bolts properly, essentially leaving the connection snug-tight when it should be fully tensioned. The fix? Do it right the first time – follow the specified tightening procedure (whether turn-of-nut, torque, or DTI washers). And if you’re ever unsure, stop and ask. Far better a slight schedule slip than a steel connection slip (literally).
In short, treat structural bolts with the respect of critical structural elements – because they are. As one engineer quipped, “Using a mystery bolt from the bottom of the toolbox in a critical connection is like putting a moped engine in a Ferrari – it won’t end well.”
3. Welded Woes – Welding Without Proper Procedures
The Mistake: A welder on site takes a shortcut – maybe skipping the preheat on a thick column flange, or using the wrong welding rod because the proper one ran out. Or perhaps the weld size on drawings is 8 mm but the welders only manage 5 mm fillets due to poor access, hoping nobody notices. Welding mistakes come in many forms: wrong process, wrong filler, lack of fusion, inadequate size, or just plain sloppy technique.
Why It’s a Problem: Welded connections rely on metallurgical continuity. If a weld is undersized or has internal defects (like slag inclusions or cracks), its strength is compromised. A cold weld (insufficient heat input) might just sit on the surface without bonding – looking okay to the naked eye but basically decorative. In critical spots, a bad weld can lead to brittle fracture or fatigue cracks down the line. If you’ve ever seen a weld fail, it’s not pretty – components that were supposed to act together suddenly come apart. Also, welding without preheat on thick sections can cause hydrogen cracking (that pesky hydrogen again) in the heat-affected zone, which might not show up until after the structure is loaded.
How to Avoid or Fix It: Follow a Welding Procedure Specification (WPS) religiously. The engineers (or a welding specialist) should provide a WPS for each type of joint, material, and position. This will specify preheat, filler metal type, passes, etc. Make sure welders are qualified for the procedure (via WPQR tests) – a certified welder who’s only ever done SMAW (stick welding) might not be the right person to do that fancy FCAW or TIG on site without training. Supervision is key: have a welding inspector or at least a knowledgeable supervisor check fit-up, root gaps, and final weld profiles. For important connections, consider non-destructive testing (NDT) like ultrasonic or radiography to catch internal flaws. This is especially vital for full penetration welds in moment frames or dynamically loaded structures.
If a welding oops is caught (say visual inspection shows under-sized welds or obvious porosity), repair procedures must be done. That often means gouging or grinding out the defective weld and re-welding properly. It’s rework, and nobody likes it, but better to fix when the steel is accessible than to have a failure later. If a crack is found, you typically stop drilling the crack ends (to prevent spread) and then remove and re-weld the cracked section following a qualified repair WPS.
Also, mind the environment: welding in the rain or high wind can cause defects (water and wind can affect gas shielding). If you see a guy welding in a downpour, that’s an oops waiting to happen – put up sheeting or wait it out.
Finally, after welding, ensure proper cooldown and avoid quenching (don’t spray water on hot welds!). Let that metallurgical magic cool at its own pace to avoid hardness issues.
Remember the rhyme: “If you don’t stick to the WPS, your welds could be a BFS (Big Flippin’ Surprise).” Okay, maybe that rhyme needs work, but the point stands.
4. The Unbraced Chase – Neglecting Temporary Bracing and Stability
The Mistake: Erecting steel frames without adequate temporary bracing, hoping the structure will “stand by itself” before the permanent stability systems (like diaphragms or cores) are in place. For example, you put up a few bays of steel columns and beams, but you haven’t installed the tying beams or any temporary guy-wires. A strong wind or a small nudge and… timber! The frame sways or collapses during construction.
Another variant is removing temporary supports too early – perhaps taking the shore towers out before the steel connection bolts are fully tightened or before the slab that braces everything has cured.
Why It’s a Problem: Stability during construction is critical – often the permanent design assumes composite floors, masonry infills, or other stabilising elements that aren’t there yet in early stages. Until the frame is complete, it can be fragile. Steel is flexible; unbraced slender columns can buckle easily if not tied together. Without diagonal bracing or rigid frames active, that moment frame you designed isn’t a frame at all – it’s a set of free-standing sticks. Gravity loads might be fine, but lateral loads (wind, accidental knocks) can wreak havoc. Many partial collapses on sites occur because temporary stability wasn’t provided or because someone removed temporary supports prematurely.
How to Avoid or Fix It: Plan the erection sequence with stability in mind. This is often the erector’s responsibility, but the main contractor and structural engineer should review it. If the building’s design doesn’t have its full bracing early, you likely need to add temporary bracing – e.g., diagonal cable braces that can be tensioned up as each bay goes up, or temporary steel knee braces that get removed later. It might involve leaving some extra beams in place as ties until concrete floors cure. Communicate clearly: mark which elements are temporary (so nobody thinks that cable is an extra bit of scrap and removes it casually!).
If a frame starts to wobble or you realise it’s not stable, pause work and stabilise it before continuing. One can retroactively add props or cables – for example, tie the top of a free column back to a fixed point (like a lower column or a neighbouring structure) until the permanent bracing is connected. Use hydraulic jacks or come-alongs to adjust and plumb frames gradually rather than forcefully tugging with a crane (which could yank something out of alignment).
Also, ensure connections are tightened as you go. A frame with half its bolts snug-tight only has a fraction of its stiffness. The standard practice is to plumb and bolt-up each level before going too high.
In essence, think like this: during construction, your building is like a newborn giraffe – a bit wobbly on its legs until it gains strength. You wouldn’t leave a baby giraffe unsupervised on a windy hillside, would you? Likewise, don’t leave your steel frame unbraced. Give it the temporary supports it needs until it can stand proudly on its own.
5. The “Measure? Never!” – Ignoring Tolerances and Fit-Up Reality
The Mistake: Assuming everything will fit together perfectly because it did on paper. This covers a range of sins: not accounting for steel section tolerances (they have camber, sweep, length variance), ignoring that a 10m long beam might naturally sag a bit under its own weight during erection, or expecting millimetre precision over large spans without surveying and adjustment. Essentially, failing to accommodate real-world tolerances and then forcing things to fit.
A classic example: trying to install prefabricated cladding or precast panels onto a steel frame that’s slightly out of plumb – holes don’t line up, so workers start ratchet-strapping or levering elements, potentially inducing unintended stresses or damaging finishes. Another: beams not lining up to receive bolts in connecting plates, so someone breaks out the torch and reams a hole larger (without approval), weakening the connection.
Why It’s a Problem: The steel fabrication industry works to standards (like ±3mm on hole positions, or beams can be a few mm off straightness per meter, etc.). If you don’t design or allow for those tolerances, parts won’t fit. Forcing components can introduce pre-stress (not the good kind) or leave things misaligned. Cutting or enlarging holes ad-hoc can compromise edge distances and capacity. In severe cases, the only solution to a major misfit is to refabricate members, causing huge delays. Also, ignoring thermal expansion tolerances – e.g., not leaving a gap where a long run of steel will expand – can cause buckling or damage when it inevitably grows in hot weather.
How to Avoid or Fix It: Design with buildability in mind. Provide slotted holes where needed for adjustment. If two big elements must meet, consider a splice with some tolerance rather than a single piece that must be exact. For instance, use shim packs and oversize holes at column baseplates (within the allowances of code) to plumb columns before final grout. Clearly communicate allowable erection tolerances to the contractor and have survey checkpoints – e.g., once the first floor steel is up, survey column positions and adjust if any drifts before stacking more floors and compounding the error.
During construction, employ experienced site surveyors to monitor that the frame is staying within plumbness and levelness limits. Small corrections can be made by tweaking bolt tension or adding shims as you go, rather than discovering a 50mm drift at the top of a 10-storey building (true story: an uncontrolled cumulative error can leave the final connections off by inches).
If something still doesn’t fit: pause and diagnose. If it’s a minor mismatch, a design-approved solution might be to enlarge a hole and use a plate washer or to grind a bit and re-weld a connection plate – but don’t do this unilaterally. The engineer should approve any cut steel or extra holes, to ensure strength isn’t compromised. Sometimes the fix could be as simple as slightly heat-straightening a member that has excess camber (with calibrated heat application). Or if a beam is slightly long, carefully grind down the end rather than hammering it in (and reapply corrosion protection after).
Key point: measure twice (or thrice), fabricate once. And when erecting, measure again. By respecting tolerances and planning for them, your steel will fit together like a well-oiled mechano set. Ignore them, and you’ll be stuck on site with a very expensive puzzle that doesn’t quite solve.
Wrapping Up the “Oops”
Each of these common mistakes can cost time, money, and a few grey hairs, but they are entirely avoidable with proper foresight and good practices:
- Misaligned bolts? Template and survey, don’t improvise.
- Wrong bolts? Spec, check, double-check – tiny markings make a big difference.
- Welding woes? Follow the procedure and treat welders like the artisans they are, not short-order cooks asked to “just make it stick together”.
- Unbraced frames? Brace it or face it (collapse, that is) – temporary works are part of the job, not an afterthought.
- Ignored tolerances? Embrace reality: steel may be king, but even kings have quirks. Account for them and you’ll have a kingdom that stands strong.
In the hustle of a project, mistakes can happen. The goal is to catch them early or prevent them altogether. Create a culture where workers can raise a hand and say “This doesn’t seem right” without blame. Most big oopses start as small oopses that were ignored. As the saying goes in construction, “Better to measure ten times and cut once, than cut once and curse ten times.”
With experience, teams get a sixth sense for these issues. Until then, keep this checklist handy, and don’t be afraid to share a few war stories of your own. A little humour and humility go a long way – it’s how we all learn. After all, steel may be forgiving in design, but it’s utterly unforgiving in execution: it will expose every lapse in planning with cold, metallic indifference. So let’s avoid those “oops” and build it right the first time.